The SYQEL desktop application is a standalone application that downloads thousands of visuals to your desktop. This means that the app can be used offline and has better reactivity to your audio.
But if you’re a DJ or streamer, you’re probably using OBS. You might try to use the cloud-based app as a browser source for your visuals. But using the cloud-based app’s URL as a browser source in OBS does not actually feed audio into the desktop app, so the visualizations won’t work.
What you can do is add the desktop app as a source in OBS. Specifically, you can add it as a “Window Capture” source.
You still get the perks of the desktop app, and can still stream in an easy, source based way. Here’s how to do it:
Note: You must already have OBS to connect SYQEL to OBS.
If you do not already have OBS installed, go do that first, then come back to this tutorial.
Step 1: Sign up for a SYQEL account. (If you’ve already done this, skip this part.)
On the top right side of the SYQEL website is a green “Sign Up” button. Click on that (or this link) and fill out the required information (name, email, password, etc.)
This account also acts as your web-based music visualizer.
Step 2: Install the SYQEL desktop VJ app. (Again, if you’ve already done this, Step 3 is for you.)
The SYQEL desktop VJ app is a pro membership feature.
Step 2.1: Upgrade your membership if needed.
If you have not signed up for a pro membership, click on the profile icon on the top right side of your screen. You should see the following:
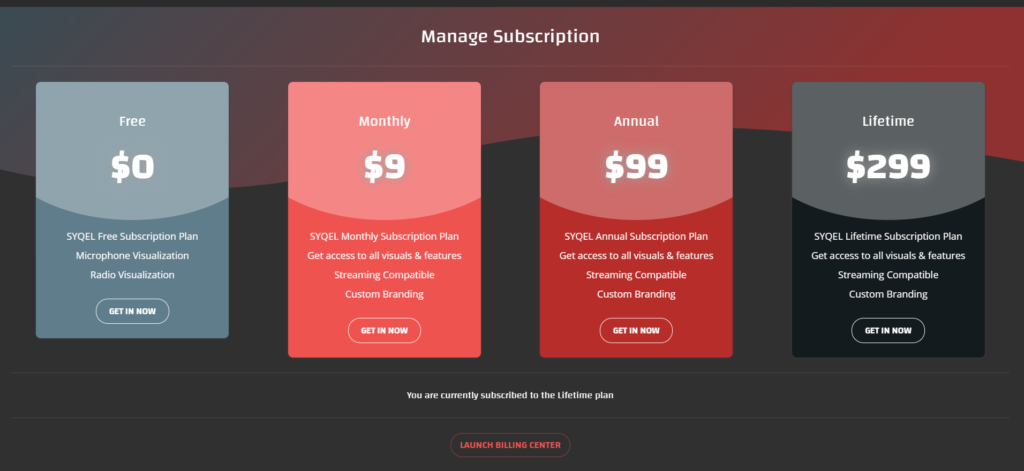
Sign up for one of the paid subscription plans, and then come back to this tutorial.
Step 2.2: Install the SYQEL VJ App on your desktop.
First, click on SYQEL VJ App in the header menu on the SYQEL homepage, or just click this link.
Scroll down to the bottom of the page and click on SYQEL VJ Windows App (the bottom of the page will look like the image shown above).
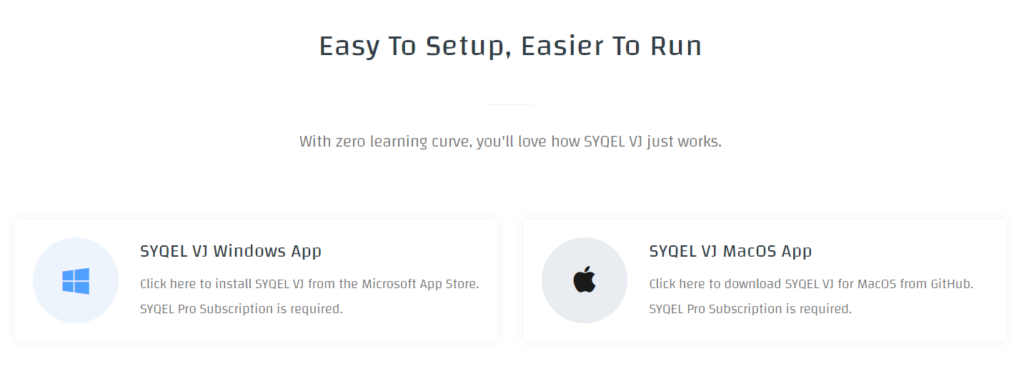
Doing this will download the app installer as a .zip file to your desktop. Once it’s finished downloading, launch the app.
You need your “desktop activation code” to complete the desktop installation.
For this, go back to the web based app (where you signed up for your account.)
On the top right side, click on your user logo and a dropdown menu will appear. Click “Settings” > “Streaming”.
You’ll then see a long activation code like the one below.
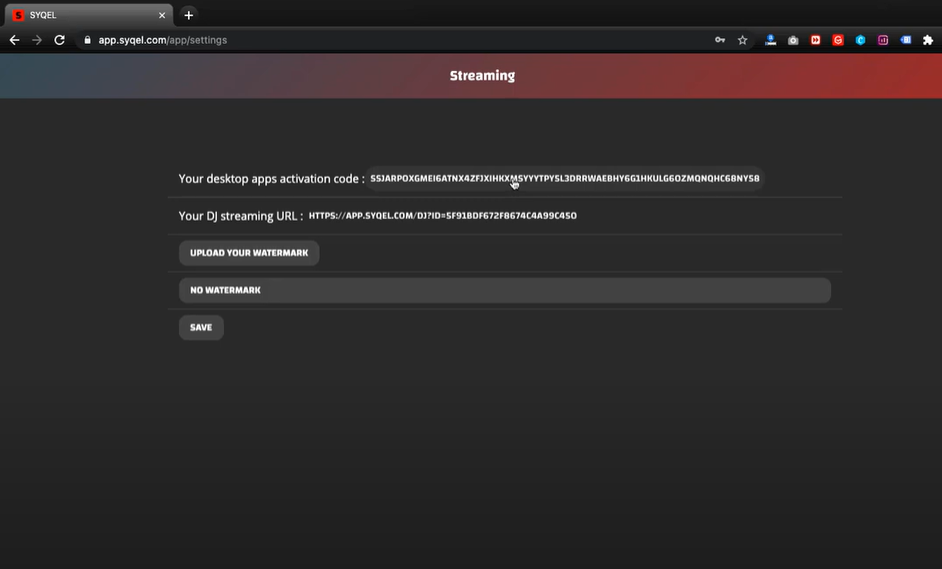
Copy the activation code to your clipboard. Then paste it into the prompt box on your desktop app.
Step 3: Launch OBS.
While the SYQEL desktop app is open, launch OBS.
In OBS, you need scenes in order to add media sources. So, if you do not already have a scene, create one by clicking the + sign under “Scenes.” Give it a name, any name.
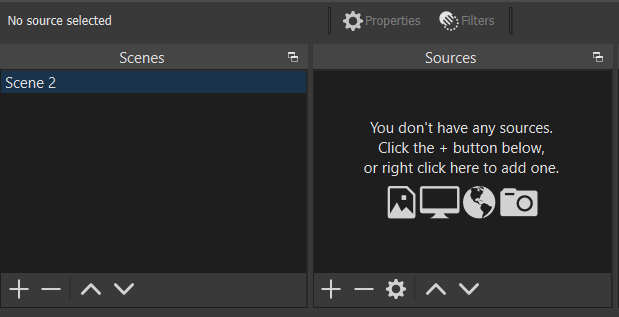
Then click the + sign under “Sources”. Click “Window Capture.”
You’ll have to give your new source a name. We recommend SYQEL (you’ll remember it, and also we’re slightly biased.)
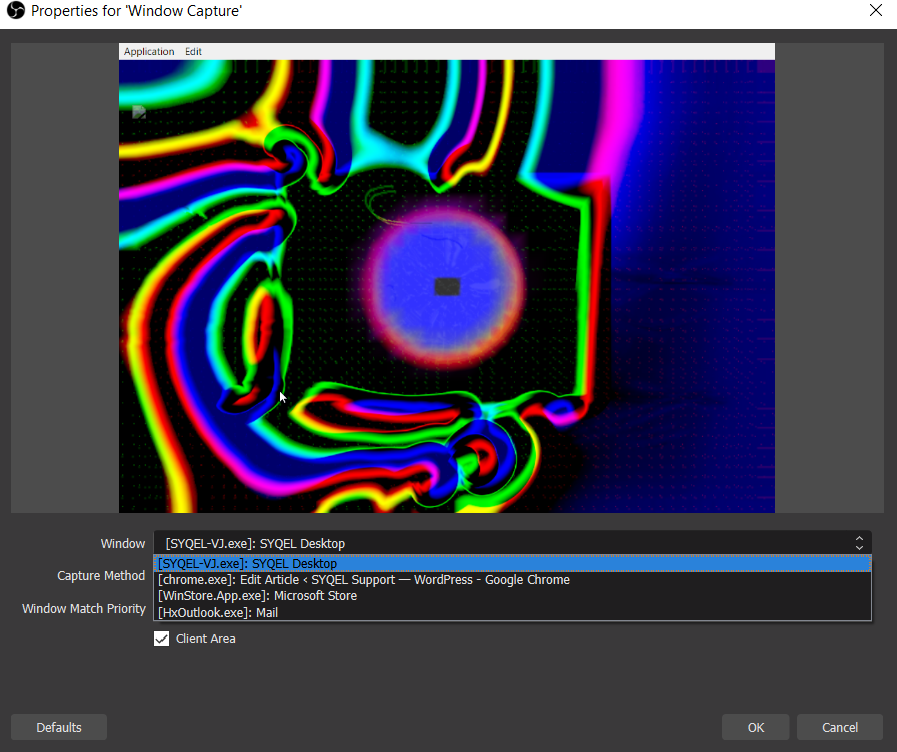
Then a “Properties” window should show up. From the “Window” dropdown menu, SYQEL Desktop is an option.
After choosing SYQEL Desktop, your OBS Preview window will match your desktop app, like in the following:
Click “OK” and the Window Capture box will close.
And that’s it: Start streaming.